SPARCStation 10 NVRAM Fix
February 2, 2019
Categories: restorations retro computing
Tags: sparc repairs retro
Intro
One of the computers in my collection is an old Sun SPARCStation 10. It came to me from its previous life at a university, which at least was kind enough to fill it with a decent amount of RAM before it came to live with me. Another nice thing for me, was that after plugging it in for the first time, everything worked just fine. It didn’t come with a hard drive, but I solved that later.
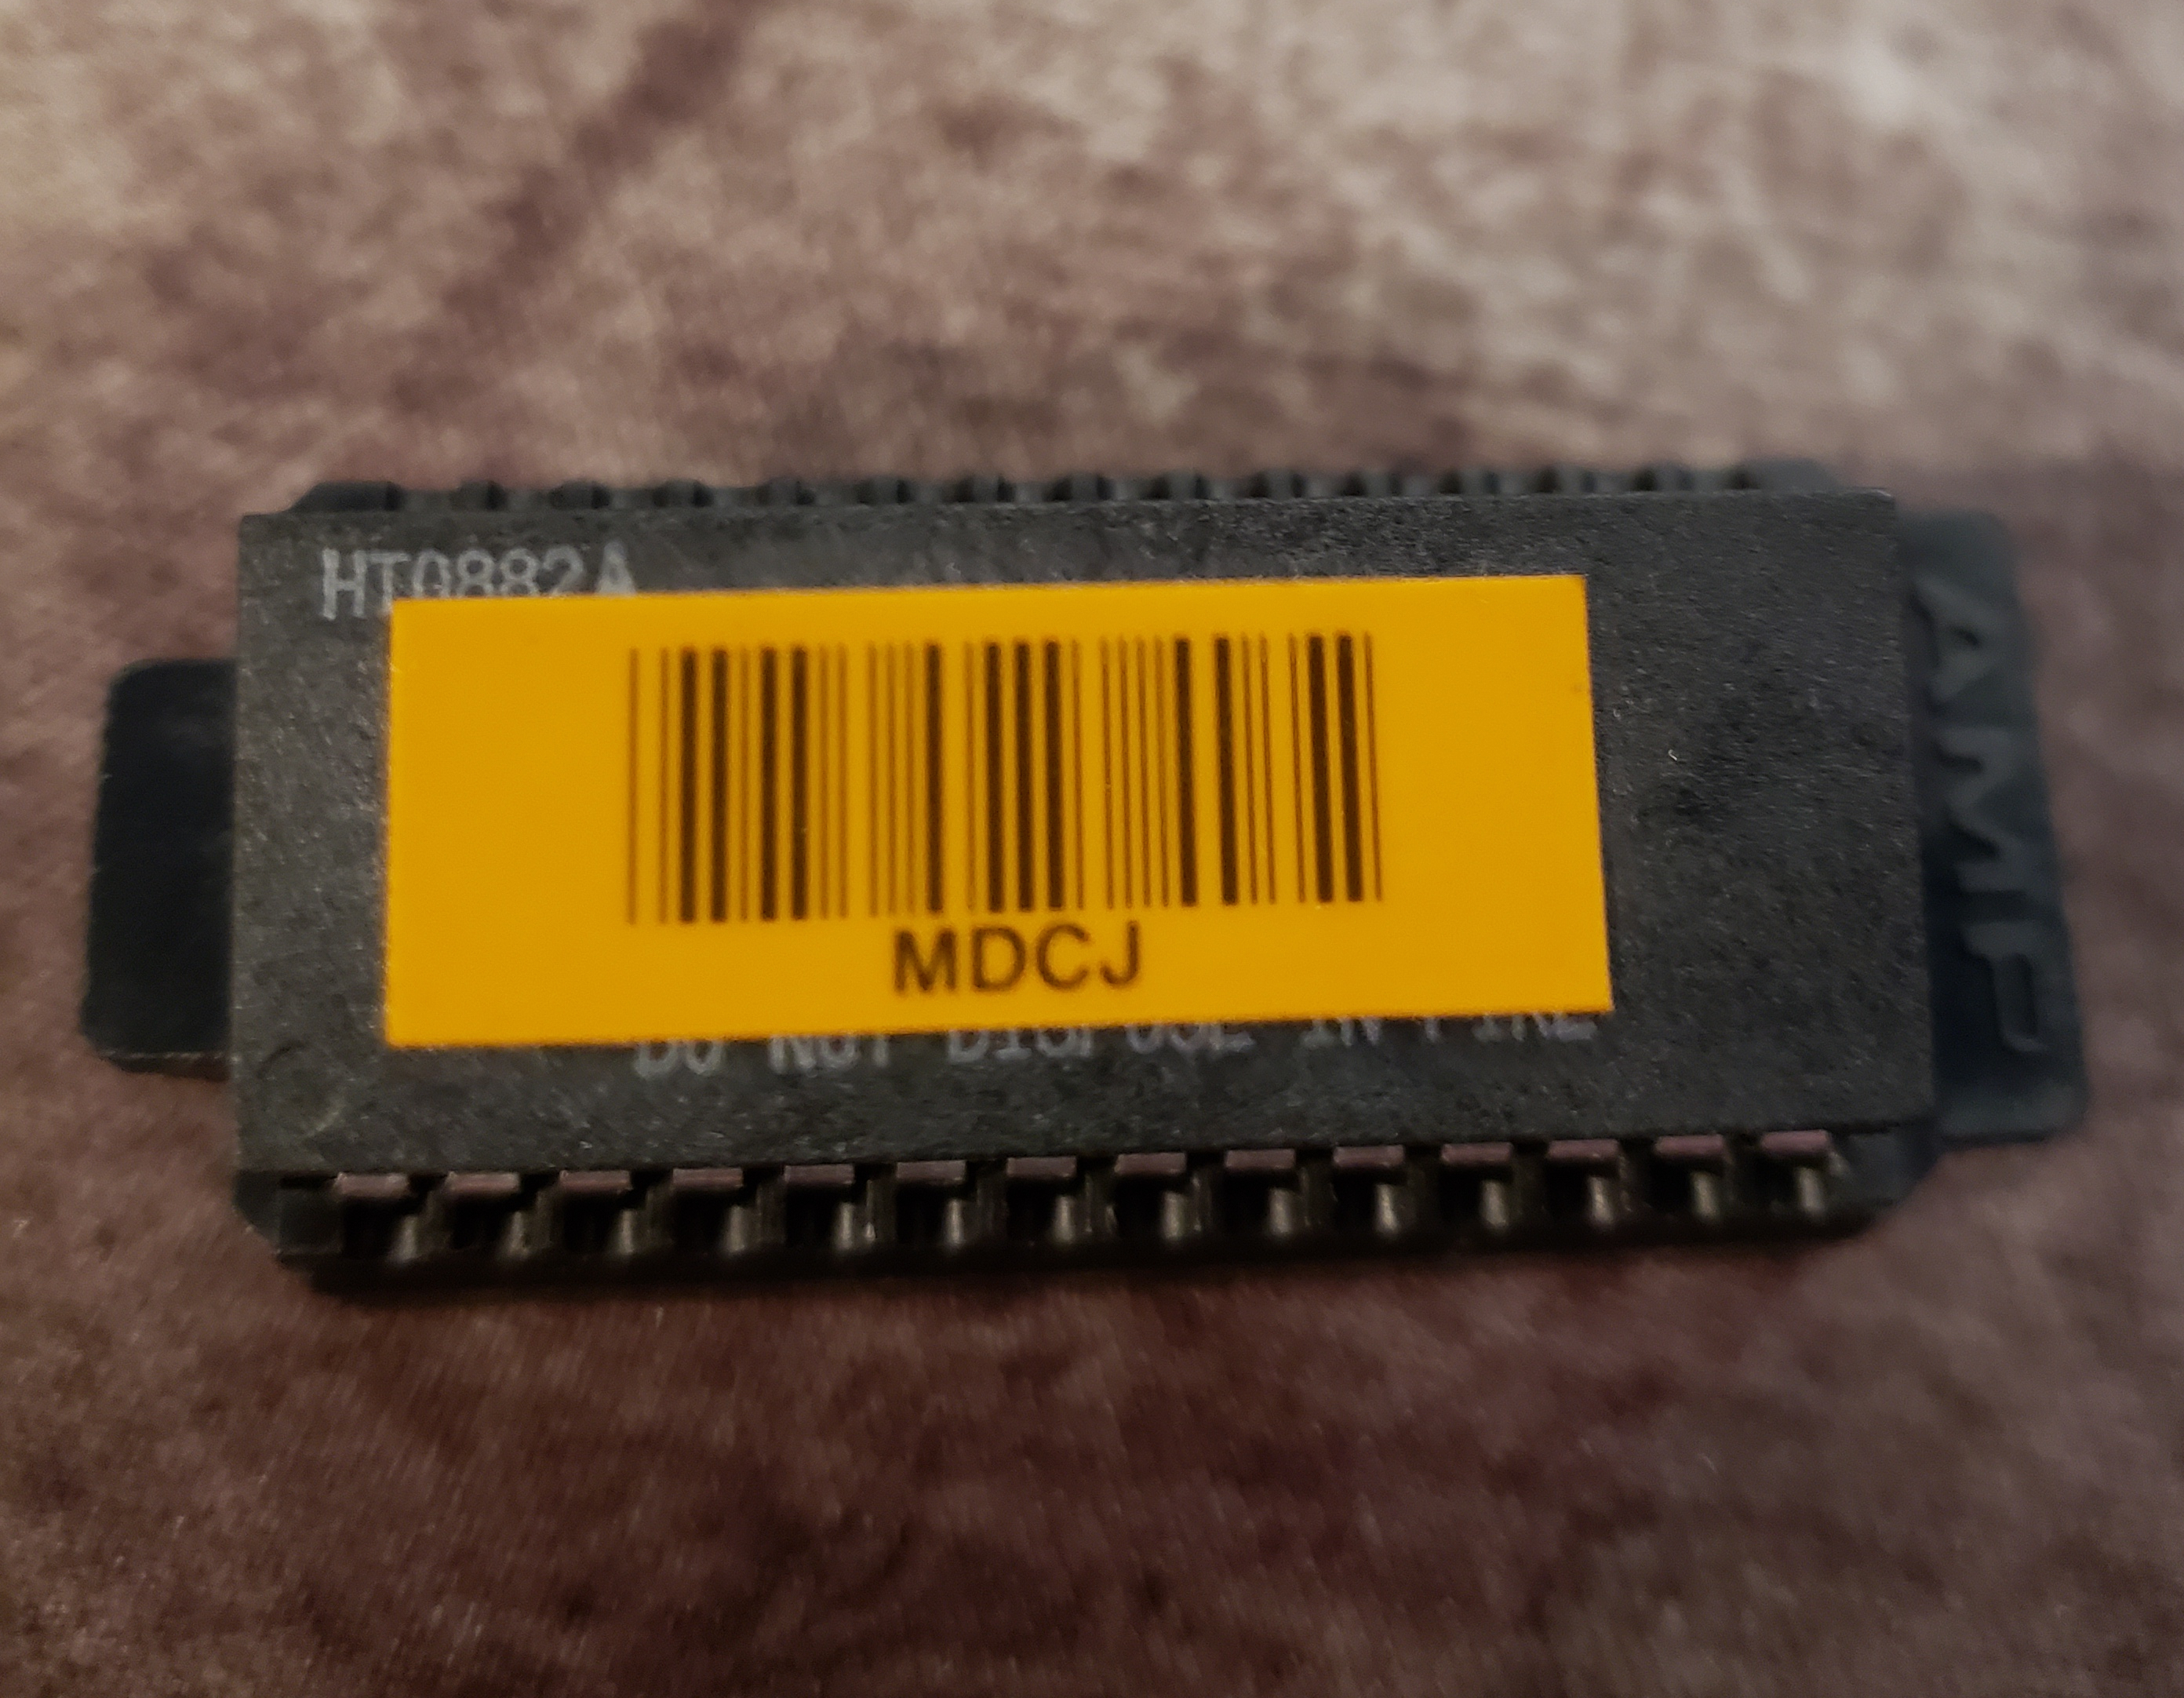
Like many of the computers of this era, it has a real-time clock with an integrated battery. Due to the age of the computer (guessing this is any early edition due to the ROM version so probably ‘92 or ‘93) the battery has given up its last electrons. While this normally wouldn’t be so bad, I could just get a modern version of the chip and call it a day, the modern version isn’t exactly the same and would also run into the same issue some time down the road. The chip used in my SPARCStation is an MK48T08 NVRAM, which keeps track of time when the computer is off, but also holds information such as the MAC address and boot parameters. There are a couple of registers on this chip that the boot ROM uses to hold information that aren’t present on the modern version of the 48T08. So while it would keep time fine, I would get warnings about the contents of the NVRAM every time I booted up. Luckily for me, other people have also been worried about this issue and there are various solutions to add a new battery to the chip.
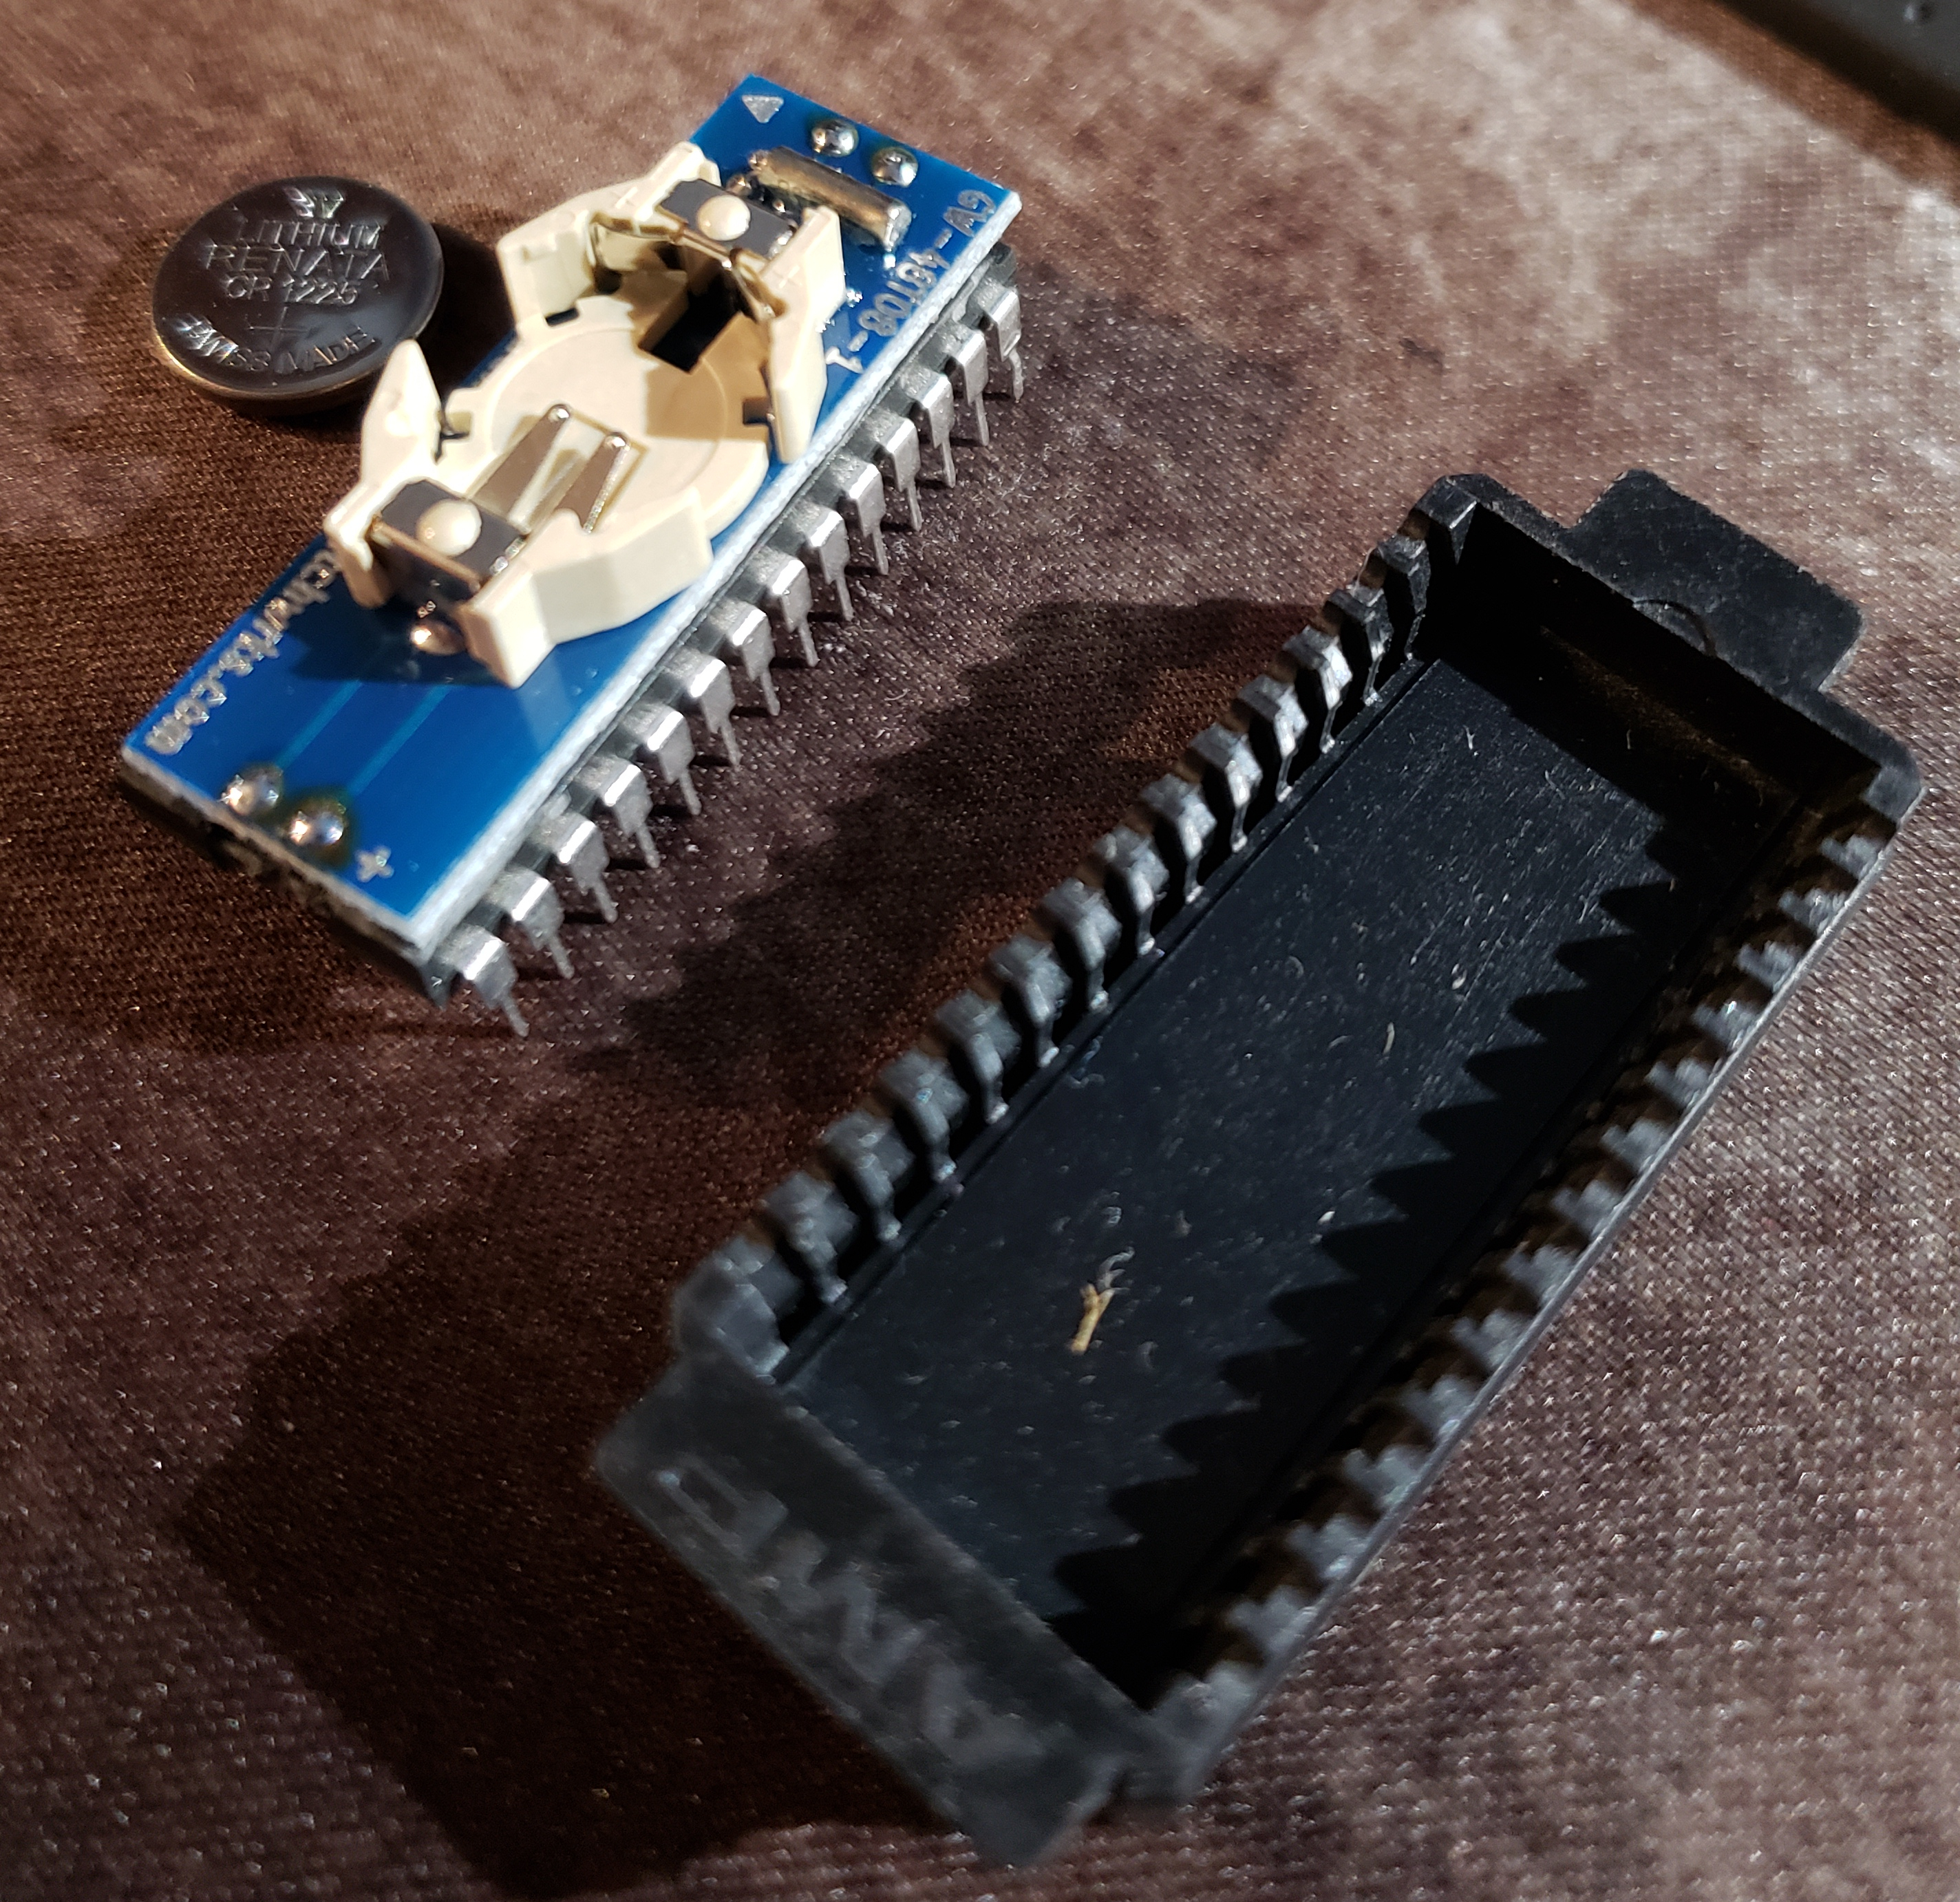
Most of the solutions I could find require cutting into the top part of the chip. This is because the battery is encased there, and because the entire package is really two separate parts that are glued together. Looking at everything from the side, we see two black boxes stacked on top of each other. The bottom box has the pins that plug into the board, and the top box is glued on top. There are a couple of pins that connect the two boxes, but they are encased in some epoxy. If we removed the entire top box, we could wire in a new battery, but then we would also need to supply a new crystal to keep the time. After doing some searches online, I found exactly that, a board that had a new battery clip (for easy replacement of the battery) and a crystal! It fits right on top where the box for the old battery and crystal sits, and is super cheap (perfect for a broke college student).
Repair
A quick online order later, and I had a new GW-48T08-1 Repair Board (Not a paid endorsement, just a happy customer). Now all I had to do was remove the NVRAM, cut off the top, solder this on and put everything back together. For the most part, it was just that simple. I did have a hard time getting the NVRAM off the board as it comes in a special housing/guide so that when you ordered a new one from Sun, you would install it in the right orientation. After using a lot more force than I was expecting to, it popped right off, and I spent the next 15 minutes sawing through epoxy to separate the two halves. Then came out the soldering iron, and putting that thing back from where it came from.
The good news, is that after powering things on again, I didn’t get any magic smoke. I did though, have to reprogram the NVRAM which had really lost all hope of keeping information between boots. Again, a bit of online searching got me all the information I needed to reprogram it. Find it all here. Turns out it was as simple as entering these commands into the OpenFirmware prompt:
set-defaults
setenv diag-switch? false
1 0 mkp
72 1 mkp
8 2 mkp
0 3 mkp
20 4 mkp
c0 5 mkp
ff 6 mkp
ee 7 mkp
0 8 mkp
0 9 mkp
0 a mkp
0 b mkp
c0 c mkp
ff d mkp
ee e mkp
0 f 0 do i idprom@ xor loop f mkp
reset
So now I have a reprogrammed NVRAM and a good, easy to replace battery in there. Time to run Unix like it’s the 90’s!